Recent Water Damage Posts
Strengthening Your Home Against Floods: Tips to Boost Flood Resilience
2/14/2024 (Permalink)
 Our team is equipped to assist you in mitigating flood-related damages and restoring your home after a flood event.
Floods can pose a serious threat to homes, causing extensive damage and disruption to daily life. Building flood resilience is key to minimizing the impact of potential flood events on your home. In this blog, we'll explore practical strategies and measures to increase your home's flood resilience, ensuring better protection against flood-related damages.
1. Understanding Your Home's Vulnerabilities
Start by assessing your home's vulnerabilities to flooding. Identify areas prone to water ingress such as basements, ground-level entrances, windows, and doors. Understanding these weak points helps in developing targeted strategies to fortify your home.
2. Implementing Protective Barriers and Seals
Invest in flood barriers, sandbags, or flood shields to create a protective barrier around vulnerable entry points. Seal gaps and cracks in walls, windows, and doors with waterproof sealants or flood-resistant materials to prevent water intrusion.
3. Elevating Electrical Systems and Appliances
Raise electrical systems, fuse boxes, HVAC units, and appliances above potential flood levels. Elevating these systems above flood-prone areas can prevent damage and reduce the risk of electrical hazards during a flood.
4. Landscaping for Water Diversion
Modify your landscaping to redirect water away from your home. Properly graded yards and the installation of swales, berms, or French drains can divert water away from the foundation, reducing the risk of water pooling around your home.
5. Installing Sump Pumps and Backflow Valves
Consider installing a sump pump in the basement or low-lying areas to remove excess water. Backflow valves can prevent sewage backup into your home during flooding, safeguarding against contamination.
6. Waterproofing Basements and Foundations
Waterproofing your basement and foundation walls with coatings or membranes helps create a barrier against water seepage. Consider professional waterproofing services for effective and long-lasting solutions.
7. Obtaining Flood Insurance
Flood insurance provides financial protection against flood-related damages. Even if you're not in a high-risk flood zone, having flood insurance adds an extra layer of security in case of unexpected flooding.
8. Creating an Emergency Plan
Develop a comprehensive flood emergency plan for your family. Include evacuation routes, emergency contact information, and procedures for shutting off utilities. Practice this plan regularly to ensure everyone knows what to do in case of a flood.
Increasing your home's flood resilience involves a combination of preventive measures, structural improvements, and preparedness. By implementing these strategies and investing in protective measures, you can significantly reduce the impact of potential floods on your home and safeguard your family and belongings.
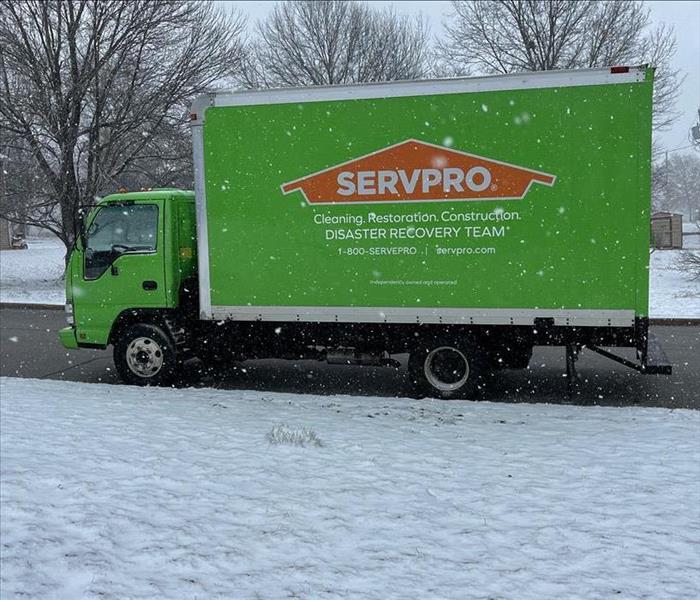
At SERVPRO of Carthage/Joplin, we understand the importance of flood resilience. Our team is equipped to assist you in mitigating flood-related damages and restoring your home after a flood event. Contact us for expert restoration services to increase your home's flood resilience!
Strengthening Your Missouri Home's Defenses Against Water Damage
10/8/2023 (Permalink)
 There are proactive steps you can take to enhance your home's resilience against water damage.
Water damage is a common concern for homeowners in Missouri, whether from heavy rains, flooding, or plumbing mishaps. Fortunately, there are proactive steps you can take to enhance your home's resilience against water damage. In this blog, we'll provide you with essential tips and insights to help you safeguard your Missouri home.
1. Maintain Your Roof
Your roof is your first line of defense against water intrusion. Regularly inspect it for missing shingles, damaged flashing, or signs of wear and tear. Address any issues promptly to prevent roof leaks during heavy rains.
2. Clean and Maintain Gutters
Clogged or damaged gutters can lead to water overflow, which can damage your roof, siding, and foundation. Clean your gutters regularly and ensure that downspouts direct water away from your home's foundation.
3. Properly Seal Windows and Doors
Inspect the seals around your windows and doors regularly. Apply weatherstripping or caulk to seal any gaps or cracks, preventing water from infiltrating your home during rainstorms.
4. Invest in Proper Grading
Ensure that your yard's slope promotes proper drainage away from your home's foundation. Proper grading prevents water from pooling around your house, reducing the risk of basement flooding and foundation issues.
5. Install a Sump Pump
In areas prone to basement flooding, consider installing a sump pump. This device can help remove excess groundwater, preventing basement flooding during heavy rains.
6. Upgrade to Steel-Braided Hoses
Replace standard rubber hoses in appliances like washing machines and dishwashers with steel-braided ones. These are more durable and less prone to bursting or leaking.
7. Regular Plumbing Maintenance
Inspect your plumbing for leaks and drips regularly. Address any plumbing issues promptly, as even small leaks can lead to significant water damage over time.
8. Monitor Indoor Humidity
Maintain indoor humidity levels between 30-50% to prevent condensation and moisture-related issues. Use a dehumidifier if necessary, especially during humid Missouri summers.
9. Advanced Leak Detection
Consider installing water leak detection devices that can alert you to potential problems. Some devices can automatically shut off the water supply if a leak is detected.
Enhancing your Missouri home's resilience against water damage is a proactive way to protect your investment and keep your living space safe and dry. By following these steps and staying vigilant, you can reduce the risk of water intrusion and the potential costly consequences. If you ever face water damage beyond your control, SERVPRO® of Carthage/Joplin is here to assist Missouri residents with professional cleanup and restoration services. We're dedicated to helping you restore your property to its pre-damage condition, ensuring your home remains resilient and secure.
How To Replace a Toilet - Step-by-Step Guide
7/27/2023 (Permalink)
Replacing a toilet may seem like a daunting task, but with the right tools and a little know-how, you can successfully complete this home improvement project. Whether you're looking to upgrade your bathroom or need to replace a malfunctioning toilet, this step-by-step guide will walk you through the process of replacing a toilet and ensure a smooth and successful installation.
Step 1: Turn Off the Water Supply
Locate the shut-off valve behind the toilet and turn it clockwise to shut off the water supply. Flush the toilet to drain any remaining water from the tank and bowl. Use a bucket and sponge to remove any excess water in the bowl and tank.
Using an adjustable wrench, disconnect the water supply line from the bottom of the toilet tank. Be prepared for a small amount of water to drip, so keep the bucket handy to catch any spills.
Step 2: Remove the Toilet Tank
Loosen the nuts on the bottom of the tank using a wrench or screwdriver. Carefully lift the tank off the bowl and set it aside. If there is any remaining water in the tank, pour it into the bucket.
Remove the caps covering the bolts at the base of the toilet. Using a wrench, unscrew and remove the nuts from the bolts. Gently rock the toilet bowl back and forth to break the seal between the bowl and the floor. Once loose, lift the bowl straight up and place it on a towel or old newspaper to prevent any water or debris from spilling.
Step 3: Clean the Wax Ring and Flange
Remove the old wax ring from the flange on the floor using a putty knife. Clean any residue or debris from the flange to ensure a smooth and secure seal for the new wax ring.
Place the new wax ring onto the flange with the tapered side facing up. Insert the closet bolts into the slots on the flange, making sure they are positioned evenly and aligned with the holes in the toilet bowl.
Step 4: Position the New Toilet Bowl
Carefully lower the new toilet bowl onto the wax ring and align it with the closet bolts. Apply even pressure to compress the wax ring and create a watertight seal. Once in position, sit on the bowl or press down firmly to secure it.
Place the washers and nuts onto the closet bolts and tighten them by hand. Use a wrench to further tighten the nuts, being careful not to overtighten and crack the toilet bowl.
Step 5: Install the Toilet Tank
Place the rubber gasket onto the flush valve opening at the bottom of the tank. Carefully lower the tank onto the bowl, aligning the bolts with the corresponding holes. Secure the tank to the bowl by tightening the nuts underneath.
Attach the water supply line to the fill valve on the bottom of the toilet tank. Use a wrench to tighten it securely, but avoid over-tightening.
Step 6: Test for Leaks and Adjust
Turn on the water supply valve and let the tank fill. Check for any leaks around the base of the toilet, the water supply connection, and the tank. Use a level to ensure the toilet is sitting evenly, and make any necessary adjustments by tightening or loosening the nuts and bolts.
By following these step-by-step instructions, you can confidently replace a toilet and enjoy a functional and efficient bathroom fixture. Remember to exercise caution, take your time, and pay attention to detail throughout the process. If you encounter any difficulties or feel unsure about any step, don't hesitate to consult a professional plumber for assistance. With a little effort and the right tools, you'll have a brand-new toilet installed and ready to use in no time.
5 Essential Do's and Don'ts After Water Damage: A Guide to Minimizing Damage
3/12/2023 (Permalink)
Water damage can be a nightmare for homeowners. It can happen due to various reasons such as floods, storms, burst pipes, leaks, and many more. Water damage can cause severe structural damage, mold growth, and other hazards. So, it's crucial to know what to do and what not to do after water damage to minimize the damage and prevent further problems. In this blog, we will discuss five do's and don'ts after water damage.
Do's:
- Turn off the power supply: Before you start any cleanup process, turn off the power supply to the affected area. Water and electricity are a dangerous combination, and it's crucial to take precautions to prevent any electrical hazards. If you're unsure about how to turn off the power, call an electrician.
- Call a professional restoration company: Water damage can cause severe structural damage, mold growth, and other health hazards. It's essential to hire a professional restoration company to assess the damage and perform the necessary cleanup and restoration. They have the expertise, equipment, and experience to handle water damage effectively.
- Remove the water: Once the restoration company arrives, they will start removing the water from the affected area. It's crucial to remove the water as soon as possible to prevent further damage and mold growth. They will use specialized equipment such as pumps, vacuums, and dehumidifiers to remove the water and dry the area.
- Document the damage: Take photos or videos of the damage and keep a record of all the items that have been damaged. This information will be helpful when you file an insurance claim.
- Ventilate the area: After the water has been removed, it's crucial to ventilate the area to prevent mold growth. Open windows and doors to allow fresh air to circulate. Use fans and dehumidifiers to dry the area thoroughly.
Don'ts:
- Don't wait: Water damage can cause severe structural damage, mold growth, and other health hazards. Don't wait to call a professional restoration company. The longer you wait, the more damage will occur.
- Don't enter the affected area without protective gear: Water damage can cause health hazards such as mold growth, bacteria, and viruses. Don't enter the affected area without protective gear such as gloves, masks, and boots.
- Don't use household appliances: Don't use household appliances such as vacuums, fans, and dehumidifiers to remove the water. They are not designed to handle water damage and can cause electrical hazards.
- Don't ignore the damage: Even if the water damage seems minor, don't ignore it. Water can seep into the walls and floors, causing severe structural damage and mold growth.
- Don't forget to file an insurance claim: Water damage can be expensive to repair, and it's crucial to file an insurance claim to cover the costs. Don't forget to document the damage and keep all the receipts and invoices.
Water damage can be a nightmare for homeowners. It's crucial to know what to do and what not to do after water damage to minimize the damage and prevent further problems. Follow the above do's and don'ts to handle water damage effectively. Remember, the key is to act fast and hire a professional restoration company to assess the damage and perform the necessary cleanup and restoration.
6 Tips to Prep Your Home for the Spring & Summer
2/10/2023 (Permalink)
Spring is the time of year when we start to shed our winter coats and get ready to welcome fresh air and sunshine. But before you can open up the windows and let in some fresh air, there are a few things that need to be done outside of your home.
Spring cleaning starts on the outside of the house!
Spring cleaning is one of those things that everyone wants to do, but no one has the time for. You're busy with work and family commitments, so why bother spending so much time cleaning?
Well, spring cleaning isn't just about getting rid of dust bunnies under your couch cushions or organizing your pantry; it's also about preparing your home for the upcoming seasons.
So whether you're looking for an excuse to get into some exercise or just want to feel happy by seeing a clean house again; here are some tips on how best to tackle this task:
Clean the gutters
Gutters are important for your home's health and safety in the spring and summer months. It is common to see heavy rain during the spring months. The gutters help prevent water damage to your house, which can result in mold, mildew, and other issues. You should clean them out as soon as possible after winter ends so that you don't have any surprises come summertime!
Check your roof for damage
When the weather gets warmer, you may notice that your roof is leaking. This can be a sign that there's a problem with your roof or it could just be due to natural wear and tear. To ensure that you're ready for whatever comes this summer season, check for any loose or missing shingles. Shingles are made out of asphalt and will often come loose during storms or high winds. If you notice any loose shingles on the ground around your house, consider hiring an expert who can replace them before they cause any damage inside the house itself!
Perform HVAC maintenance
As you prepare your home for spring and summer, consider performing routine HVAC maintenance. Routine HVAC maintenance helps ensure that your heating and cooling systems are running efficiently, which can save money on utility bills.
Here's how:
- Check filters
- Check ductwork for blockages
- Inspect the system for leaks
- Clean out dust buildup
- Inspect chimneys/fireplaces regularly
If you are unsure how to properly perform HVAC maintenance, it is always best to call an HVAC company for assistance!
Test your smoke alarms
It's a good idea to test your smoke alarms once a month. This will ensure that they are working properly and alerting you of any potential danger.
If you don't hear anything at all when testing your alarms, it might mean that the batteries are dead. It is important to change the batteries as soon as possible to ensure that the smoke alarms are functioning properly.
Clean your yard
Spring is the perfect time to clean your yard, make it look nice, and prepare for any spring storms. You can use a pressure washer to get rid of dirt and grime on your driveway and sidewalk, then sweep with a broom or hose down any patio surfaces (like porches). If you have one, use a leaf blower in the yard to remove debris such as leaves and twigs that have collected over winter. Clean up any messes left behind by winter weather so that when spring rolls around, you'll be ready for it!
Spring is almost here, and with it comes the urge to do some cleaning. You may have thought about doing some spring cleaning before, but maybe didn't know where to start or what could be done outside of the house. Look no further than this article for tips on how to get your home ready for the spring in no time at all.
How To Avoid Freezing Pipes
11/2/2022 (Permalink)
Tips for Preventing Pipe Freezing
Freezing pipes are a pain. They can burst, causing water damage, and cost a lot of money to fix. To prevent this, you'll need to make sure the temperature in your home doesn't drop too low overnight, as well as maintain moderate temperatures throughout the day when no one is home. We've got some tips that will help prevent frozen pipes from happening!
Let Water Drip from Faucets
When the temperature drops below freezing, the water in your pipes will freeze and expand, which can cause the pipe to burst. To avoid this, let water drip from faucets served by exposed pipes, such as the kitchen sink or bathroom sink. If you have a flowing water faucet that is not on an exposed pipe, leave it open about half an inch for a slow drip of water to keep the pipe from freezing. Don't forget to turn off all faucets when you leave the house!
Leave the Heat on in your Home
If you are going away for more than a few days during cold weather, your best bet is to leave the heat on. You can also turn down the thermostat to 60 degrees if you will be away for only a couple of days. The temperature in your home does not need to be set below freezing; it just needs to stay above freezing for pipes that are exposed and outside walls.
Open Kitchen and Bathroom Cabinets
Another easy way to prevent pipes from freezing is to open cabinet doors in both the kitchen and bathroom. This will allow heat from your home to circulate throughout the space, which will keep everything nice and warm.
Keep Garage Doors Closed
If you have a garage door that opens into the house, make sure it's kept closed if there are water supply lines in the garage. Cold air can get trapped in the garage when it's opened up to let people and vehicles in and out.
Maintain Moderate Temperatures in your Home
Maintain moderate temperatures in your home, even when away. This will reduce heat loss from your home and keep warm air inside as long as possible.
Keep the thermostat set to the same temperature both during the day and at night. Maintaining the same temperatures throughout the day and night can help prevent your pipes from freezing and bursting. Though it might cost you a bit more on your electricity bill, it is better than paying the price to repair your home after a water loss.
Hopefully, this article has given you some insight into how to avoid frozen pipes. If you have any questions about whether or not your pipes are going to freeze, please contact us. We’re always happy to help! If your home or business has suffered from a pipe burst, our SERVPRO team can assist you with all your water damage cleanup and restoration needs!
Ways To Keep Water out of Your Crawl Space
8/27/2022 (Permalink)
How Do I Keep Water Out Of My Crawl Space?
When it comes to flooding at home, basements, cellars and crawl spaces are among the most common places to find water. While you may not worry too much about a little water in this tiny part of your home, if you neglect the problem, it could lead to more serious issues in your Joplin, MO, home like mold growth. Make sure you take the proper action to help ensure you don’t end up with a wet crawl space.
How it Happens
As a homeowner, you have a host of matters you must deal with to keep your home safe. A flood can frustrate you because of the cleanup and repair costs, not to mention potential health and safety hazards. Here are some signs your crawl space may be at risk for water buildup:
- Broken underground lines
- Poorly graded property
- Broken or incorrectly installed downspouts and rain gutters
Pay Attention to Landscaping
One of the biggest culprits for a wet crawl space is when your property doesn’t have the right slope. Your lawn and other landscaping should slope away from your home so when heavy rain comes, it won’t build up on your property and find its way into your basement. Make sure water is draining away from your house.
Don’t Water too Much
If you’ve got a garden or flower bed close to your home, be careful about how much you water it. Overwatering can easily cause water to leak into your crawl space and cause flooding.
Check Your Rain Gutters
If a storm hits, you count on rain gutters and downspouts to guide water away from your home toward the street. Check these on your house to ensure they are collecting water near your foundation or window wells.
If you’re worried about a wet crawl space, get in touch with a professional to inspect your property. These technicians can also help you clean up after a flood.
Characteristics of Category 2 Water Damage
6/24/2022 (Permalink)
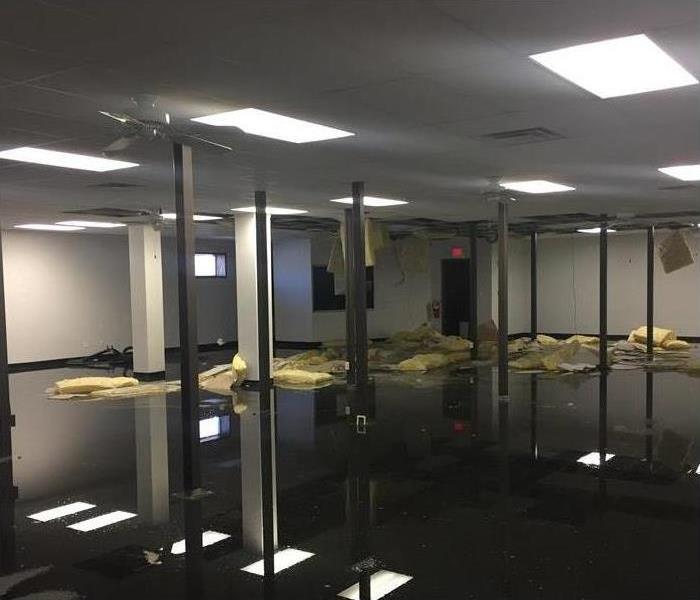 Commercial water damage in Sarcoxie, MO.
Category 2 Water Damage
In Sarcoxie, MO, a water loss in your business is nobody’s idea of a good time. Besides the revenue lost from a water pipe repair, there could be permanent property damage and maybe even worse. See below to find out more about Category 2 water and how it affects the severity of the situation.
Second Floor, Broken Pipe
You find out your business needs a water pipe repair when you return from Christmas vacation. A broken line in the second-floor restroom caused Category 1 water to accumulate in the walls and ceiling undetected for the holiday week. By the time everybody returned to work, the Category 1 water had become Category 2 due to the length of time and warm temperatures from a heated building. Not to mention contamination from the bathroom and dust, debris, and insulation between floors.
The Institute of Inspection, Cleaning, and Restoration Certification says that Category 2 water can potentially cause illness in humans. This type of water, also known as grey water, might contain hazardous levels of microbes and microbe fuel, along with other things found in a restroom.
Here are some examples of Category 2 water:
- Overflowing toilets containing urine only
- Discharge from a washing machine or dishwasher
- Leaky water beds and aquariums
First Floor, Flooded
The Category 2 water stewing between the first and second floors broke through the ceiling on the first floor, causing a mess in the lobby. Heat in the building kept the water at the right temperature to encourage further microbial growth. If given a little more time, the Category 2 water could have become Category 3 water with vast numbers of microorganisms. Not a very welcome sight for visitors.
If given enough time and the right temperature and contamination, Category 1 water can become Category 2 or 3.
4 Ways To Dry Soaked Documents
3/31/2022 (Permalink)
Methods for Drying Wet Documents
If your business in Carthage, MO, experiences flooding, it is possible that your building suffers enough damage to require the services of expert water restoration professionals. Additionally, archives may become soaked. Fortunately, wet documents can be recovered. Here are four methods for salvaging your company’s records.
1. Freezing
Wrap reports in wax paper, parchment or sealable plastic bags and then place them in a freezer. If you have time, apply separators between each piece of paperwork. Once your materials have thawed, follow up with one of the below procedures.
2. Air Drying
This option is best for smaller bundles of compromised files. Begin by spreading your items on flat tables. Place fans near your papers, but be sure that the airflow is indirect; otherwise, they may go flying. Blot dampened pages with a soft cloth or towel and then hang them on a clothesline with plastic clothespins. Note that it may take up to two weeks for some wet documents to completely dry.
3. Vacuum Freezing
Vacuum freezing is a better choice when a lot of document drying becomes necessary. Freeze your papers as outlined above and then place them in a vacuum chamber. This piece of equipment can be obtained from a salvage vendor. By using a process known as sublimation, ice crystals vaporize without melting. This assures a minimum of additional stress on the affected reports.
4. Vacuum Thermal Drying
Records that have suffered watery ravages ranging from minor pipe leaks to intense flooding can benefit from vacuum drying. Items are placed within one of these enclosed devices and dehydrated via moisture evaporation. Only use this method with records that do not need to be kept for long periods, as this strategy accelerates aging.
Wet documents are a severe problem for any business, but all is not lost. There is a good chance that a majority of your data may be able to be saved with one of these approaches.
3 Possible Causes of a Flooded Basement
3/31/2022 (Permalink)
Three Causes Of a Flooded Basement
In the event that you experience a basement flood in your Neosho, MO, home, quick and decisive action must be taken. One thing that can help the restoration process go faster is knowing why the flood occurred. If you're unsure about how this could happen, here are three possible causes of a flooded basement.
1. Ineffective Sealing
If your basement's tiling wasn't properly sealed, water can easily leak into your home. This is particularly relevant if you live in an area that's prone to events such as these:
- Hurricanes
- Snow storms
- Wind storms
- Rain storms
In the event that your basement is continually flooded during large storms, ineffective sealing is likely to be the reason for it. Be sure to get the seal inspected and fixed immediately.
2. Eavestrough Blockage
Eavestroughs are gutters that line the perimeters of roofs. The purpose of these troughs is to direct water away from your roof and through the downspout. However, an eavestrough can malfunction if debris begins to plug it up. This is especially possible if you live near several trees. In this event, the overabundance of water may create a leak that starts a basement flood. If this is the issue, all you need to do is have the eavestrough cleaned.
3. Wrong Home Location
This problem may have a simple answer - your home was built in an inappropriate location. Generally, houses are built on a slope so that water will move away from the structure. Your house may have been built near the slope's bottom, which would result in the draining water creating a basement flood. Unfortunately, there's not much to do if this is the case. Try to put up barriers and wait for erosion to rectify the issue.
Dealing with a flooded basement requires some investigation. If the flood's cause is discovered, the water damage restoration process may be able to move faster.
Simple Steps To Making a Water Damage Claim
1/19/2022 (Permalink)
How To File A Water Damage Claim In 3 Easy Steps
If bursting pipes, severe weather, or other factors cause flooding in your Carthage, MO, home, you may rely on your insurance policy to cover the cleanup bills. It’s important that you fie a claim promptly and correctly to make this as smooth a process as possible. Understand your coverage and what steps you must follow.
Things To Initially Consider
Your insurance plan won’t cover all water damage and related issues. In the following cases, you’ll either need supplemental coverage, or you’ll need to take care of the repair costs yourself:
- The damage occurred due to normal wear and tear.
- The damage occurred due to your own neglect of maintenance and upkeep.
- The damage occurred because you intentionally tampered with or broke pipes.
Assess the Damage
Before you start trying to fix a broken pipe or do any other maintenance, determine exactly what areas of your home suffered damage and where the water problems originated. No matter how large or small the incident was, it’s crucial to provide this information to your insurance agent.
Record the Damage
Write down different items of your home that bursting pipes affected and ruined. Also, take photos of the water damage and areas that will require cleanup and restoration. Save these pictures and records for your insurance representative.
Contact Your Agent Promptly
Obviously, you’ll want to get in touch with an experienced disaster cleanup specialist to remove water from your home and to make the area safe once again. But you’ll also want to speak to your insurance company without delay to start the claims process. It’ll be much easier to file a claim and get payment if you communicate with the insurance representative on the day of the incident.
You hate thinking about bursting pipes or other issues causes water problems in your home. It’s nice to know you can count on a competent insurance provider to ease your burden.


 24/7 Emergency Service